Showing posts with label Artsy Craftsy. Show all posts

Monday, November 10, 2014

Costume Creation: Shinjuku Robot

Husband and I both had Japan-specific costumes for our last Halloween in Tokyo. Mine was based on the Amazonian fembots of the Robot Restaurant in Shinjuku, which I decided I wanted to do the first time I saw the show. (See my Halloween post for photos of my costume next to the real robots!)

Photo on left from here.
This has been my most time intensive costume yet, over 7 months I clocked 110 hours of construction time. Most of the materials are foam and cardboard, with touch lights, chair, magnets, and elastic from the ¥100 store. (For all intents and purposes, ¥100=$1.) Fabric for the skirt/top/backpack were more of an investment, but I used the whole meter of red I purchased, and I'll find a use for the rest of the blue stretchy vinyl eventually.

Feet
Started with a cardboard model over sneakers, ended with craft foam over Converse for a lower profile and less of a tripping hazard.

Legs
Lower pieces are held on by elastic straps, upper pieces by magnets paired with partners sewn into leggings. Two are pictured, I ended up adding three more on each leg. It still fell off when bumped too hard or if I bent my leg too far, but it held up for two weekends, but I ended up being able to walk all right and even manage stairs as long as they weren't too narrow or tall.

The foam mats I used had some sort of magical nonstick coating, so in order to stick anything to them I used my trusty Dremel to sand off the top layer.

Skirt and Legs
Sewing is still very much a weakness for me. This simple skirt (from this series of tutorials) is definitely flawed, but it was good enough for this.

Top
Making a bra pattern out of non-stretch material was incredibly challenging, but I didn't have time to learn how to make one properly, so I did a bunch of trial and error and came up with this.
The craft foam (and halved styrofoam ball) accents are more my strength.
The gems are coated with Mod Podge, painted blue, shaded with dark purple around the outside, and coated with pearlescent nail polish.

Somewhere around here I realized I painted the two top pieces upside down and had to redo the shadows. Grumble grumble.
The orange and blue are watercolor marker that worked beautifully on top of the base paints, but rubbed off just as well. Note to self: spray sealant after using these on foam.

Foam pieces attached with adhesive-backed velcro.

Shoulders
More patterning by trial and error and guessing, more foam mat pieces. Duct taped underneath and placed on the dress form to get the right angles of bending, then hot glued in the gaps, coated with paper, and hot glue swirls and craft foam bezels added.
Pauldrons made of cardboard, everything spray painted silver.
Pauldrons had to be removable in order to attach the shoulder piece to the costume. Magnets and duct tape!
The top is completed by a me-colored long-sleeved tee shirt for modesty and warmth. It's harder to find such a thing than you might expect.

Backpack
I used a cheap nylon drawstring bag and added a zipper, then squares of scrap fabric for the colors. The spikes are made of a paper clay, the gold edging is a string of gold sequins, and the lights are the same as the gems on the top and shoulder piece.


Pilot
I wasn't sure if I was going to add in a pilot or not, but then I couldn't believe my luck when I found the perfect sized chair.
I was hoping to find a doll the right size that didn't look like a baby, but the search ended when I found this Hello Kitty doll. I made her a new costume out of quilted thermal fabric (like they have in cooler bags), cardboard, and craft foam. She was wired into the chair, the chair was belted on to me, and off we went!

Not everybody knew what I was, but enough did. Plus I got to take pictures at the Robot Restaurant, which was awesome. There was also this one guy at a party that didn't get what I was for a good ten minutes, but when it clicked he literally fell down. (Onto a chair, but that's not the point.) It was very satisfying.

Saturday, November 8, 2014

Costume Creation: Namazu

Husband and I both had Japan-specific costumes for our last Halloween in Japan. For him, we opted for a woodblock-inspired namazu, the catfish of legend that causes earthquakes by thrashing about in its lair.

Reference photos from here.
People tended to think he was a cockroach until they saw the reference photos, but then they got it. Not surprising, it's a bit obscure.

Here's how I made it! Not nearly as intense as the robot costume I made for myself, but it was a whole new set of challenges.

Step 1: paper planning.
It's built around a bicycle helmet that we knew would fit Husband's giant head, so I put it on, took some reference selfies, printed one out and sketched the outline I wanted to create.


Step 2: use cardboard, craft wire, and duct tape to create the outline. Include padding as necessary.

Step 3: Add craft wire for lower jaw, experiment with shapes to get the chin, ultimately to be made of fabric. It turns out that the expandable foam padding that they put on wine bottles in our local stores is great for this sort of thing.

Step 4: make an educated guess at the size and shape the chin fabric needs to be (practice version pictured).

Step 5: guess at a pattern for a helmet cover, make a practice version of that too.

Step 6: turn cover right side out, evaluate, decide where to put the dart at the back of the head (couldn't get around darting no matter how I pinned it).

Step 7: make the real one from tee shirt fabric for the chin and pleather for the helmet cover. Note: hand stitch everything because it was faster to stitch the chin fabric without disassembling the jaw wire and because sewing machine really, really doesn't like the traction of the pleather. (This step not pictured, I was in a rush to finish so we could go out for Halloween a week earlier than I expected)

Step 8: send Husband to the store for styrofoam balls and whisker material (he chose well for both) while finishing hand stitching. Cut foam ball in half, draw on pupils, hot glue to head. Stitch on foam strips (originally meant either to block drafts under doors or protect furniture corners) as whiskers.

Photo from the Metropolis Magazine Facebook page.

Thursday, July 17, 2014

Shiritori Store Looks More Professional

I posted about our website, Shiritori Store, when we first made the site live. But four photo sessions and 13 tee shirt models later, it looks a lot better!


So I can do a little bit of plugging for some friends, our models included Chihiro of I'm Made of Sugar!, Masa from the Pirates of Tokyo Bay, and Todd of Beer Cats. I intend to add a Meet the Models feature with more details to the site.

We still have plans to add more photos, not all of our models are represented on the home page, and the whole idea behind gathering a bunch of volunteers to wear our shirts is to show how they fit on actual people. That gets lost if there aren't enough photos. Hopefully soon I'll have another update.

For instance, I don't know how I'm going to use this photo yet, but I definitely will.


The other piece of news is that we donated some shirts to the Pirates of Tokyo Bay to give away during the raffle at their shows, so if you're looking for some laughs and a chance to win a shirt (or one of their other great prizes, often things from Lush or Starbucks or a wine store), check them out in the next few months! Arrive early to get a good seat, they get taken pretty quickly.

Sunday, May 4, 2014

Shiritori Store is Online!

It's been a longer and more complicated process than I expected, but our tee shirt site is live and open for business!

Just a quick explanation of the premise – there's a popular word game here in Japan called Shiritori. It's usually played with a group of people and you go around the room listing words. The challenge is that the last character in a word has to be the first character in the next word.

I essentially smooshed two words together that share a character (with one or two exceptions) and drew a picture of it.

Risu (squirrel) + sumo (wrestler) = risumo, a squirrel sumo wrestler.

Ika (squid) + karaoke (singing along into a mic in front of your friends) = ikaraoke, a singing squid

You get the idea.

We decided on a print-on-demand tee shirt company (Spreadshirt) and set up an online storefront.

And we got business cards made, just like a real company! And sticker sheets! I'm so excited about giving out these sticker sheets I should probably be embarrassed.

I really hope it results in some sales, we definitely
made a bit of an investment in getting them printed.

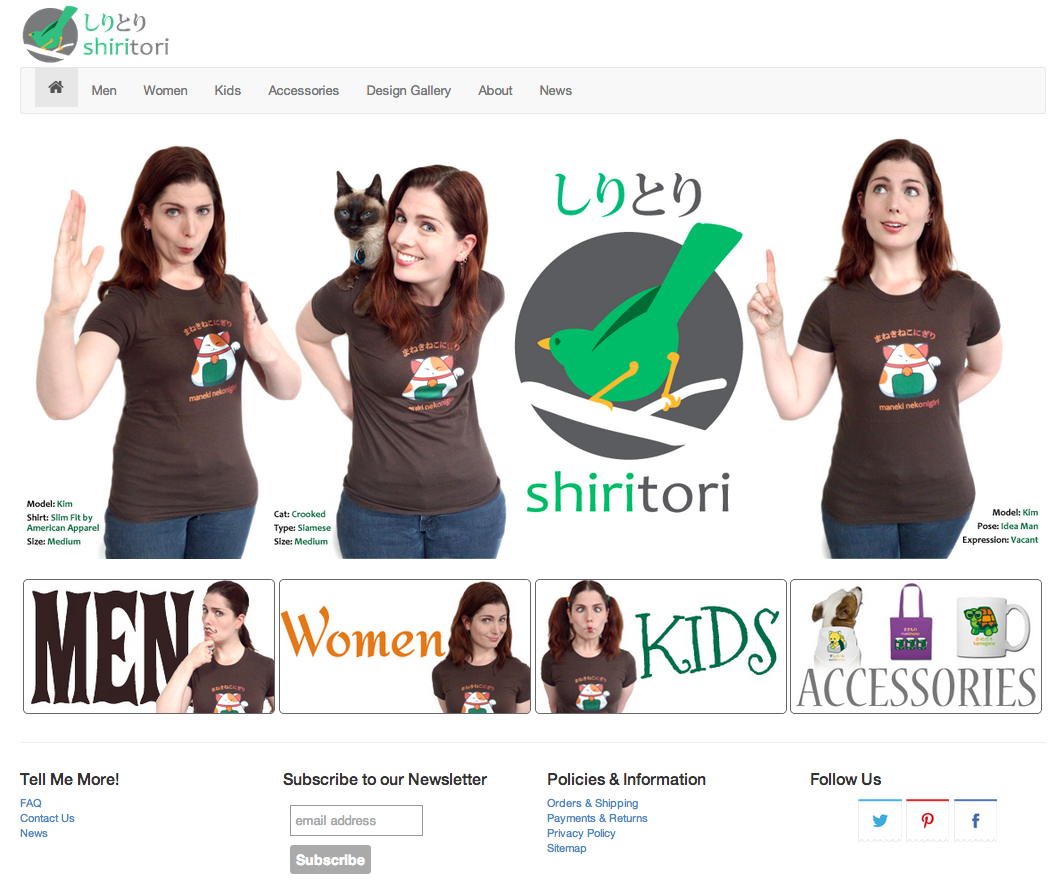
The site is live and functioning, but you may notice there's a little too much me on the home page.

Shiritori home page

It's because, at time of writing, we only have one physical shirt. This was a more amusing solution than using the stock photos provided by the POD company and Photoshopping all the designs in.

That said, we have ordered an assortment of shirts and drafted some friends to model for us. Soon we'll be another step closer to looking like a legit tee shirt site!

Monday, October 21, 2013

Costume Creation: Scorpion from Mortal Kombat

The Character:
Scorpion from Mortal Kombat: Armageddon, made for a friend that had never had a Halloween costume before. (Gasp!)

Reference photo from here.


Materials
Aside from the shoes and black clothes, this is made almost exclusively of felt, foam, and glue sticks. Exceptions to that are four straps for the shin guards, one nylon belt with attached clip, some duct tape, an old thin shirt cut up to line the mask and bracers, and a smattering of velcro. The base yellow paint is some heavy duty stuff I had from a previous Halloween, and the other colors are acrylics or water-based paints from the hundred yen store.

Construction
I'm not showing the paper patterns because they're boring, but trust me, there paper versions of every part of this costume, sometimes more than one.

Click any of the photos to see a larger version.

The vest is made entirely of felt. The pattern itself is pretty basic, just wide strips that drape over the shoulders. What is harder to show is that there is one layer directly over the shoulders and a higher layer that flares up a bit, with wire sewn into the top of the curve to help hold the shape. Halfway through construction I added a strap across the chest to keep the sides from falling off the shoulders.

1. uncut felt
2. felt strips draped over DIY dress form
3. inside pocket
4. wire added to shoulder flares (sewn in by hand), chest strap
5. side view
The yellow parts are single shapes of felt sewn into fairly simple shapes and attached to the vest.

It wasn't easy to find screen grabs of the back, but I eventually did find one.

The green foam sheets for the center part are held in place initially with velcro. By the end they were glued in along the top edges.

1. felt and belt
2. foam clipped in place
3. center panels marked placement with chalk and temporarily attached with velcro

The belt is a blue nylon strap with a plastic clip wrapped in duct tape. The skull is sculpted from some wood pulp clay I found at the hundred yen store. It's almost bouncy, incredibly light, and takes glue and paint pretty well. The down side is that it doesn't get along with sandpaper. I could have made a smoothing layer out of something else if I had to, but in this case it's fine if it's a bit rough.


The mask went through some agony in the planning stage. I debated between papier mache and foam, went through several paper pattern ideas, and ultimately landed on this.

1. individual pieces; red segments to add depth to cheekbones, heated at nose bridge to form curves
2. cheeks, jawline, and cheekbones glued together
3. adding the T portion to cover the mouth and nose
4. comparing to reference image
5. view of the inside; blue added to keep mask from spreading
6. mask lined with thin fabric to hide tip of nose and mouth
Mom, remember that heat gun you sent me for Christmas? This is what I'm using it for – forming foam sheets into more interesting shapes. I used it a LOT. Some for forming the mask, sure, but mostly to make all the armor parts into 3-D geometric shapes.

I thought I had pictures of making the blocks for the front of the vest, but if I do I can't find them. But you get the idea from the bracers and shin guards.

The bracers were sized by wrapping a foam sheet around my friend's arm and marking where the overlap was. Then it was all sketches on paper based on the reference image. The heat gun helped the foam fold and keep that shape, and glue gun glue was put in all the creases and seams to help hold the shape.

1. foam sheets cut into appropriate shapes
2. Shapes in approximately the right placement
3. shapes formed by heat gun and glued to reinforce the corners
4. Glued to flat sheets (velcro closures added later)
The shin guards were a similar process, except I didn't need to measure any limb circumferences.


Painting
Here's where it starts to look like a real thing. A detail that's easy to miss is the very edges of the foam sheets. Where they show, I made sure to color them in. It wasn't worth sealing and painting, so I just used a marker.

To prep the foam for paint, I used a mixture of Mod Podge and water (more Podge than water) with a little bit of Tacky Glue mixed in. After 5 or 6 coats, the foam started to look shiny, and that's when it's ready. Fortunately, each coat dried in about 20 minutes.

The flat yellow is some kind of house paint, I think (the label is in Japanese), because it's waterproof and cracks instead of flexing around corners. To get around this, I cut it with Mod Podge and Tacky Glue, about 2:1:1. It took probably six or eight coats to get it to a solid yellow. It's still a little transparent in that you can tell which foam sheets started out darker and which started lighter (green is harder to hide than pink), but after the shading and battle damage it's impossible to tell. The black paint is a water based paint, that covered pretty well in 2-3 coats.


 The orange shading was accomplished by mixing some of the yellow with an acrylic vermillion, about 1:1. Then it was brushed on with a wet enough brush to smear the colors so they'd blend. The darkest brown is a watered down brown. The light source was easy enough to paint for everything but the arm bracers. For the arms, I just shaded the edges instead of picking an edge for light and an edge for shadow.


The fun part is adding battle damage. It's just two lines, a dark brown one on top, a white-yellow line immediately underneath. 

The same white-yellow was added to the vest plate corners, the high points of the mask, and any edges that would catch light.

I am particularly happy with this picture.
Same thing with the shin guards. The shin guards were completed by adding black foam to the back and gluing additional strips of foam on to hold the straps in place. The straps are strips of woven cotton with added velcro. (Elastic would probably also work.) Lucky for me, I found black glue sticks, which cut down on visible glue blobs.


The arm armor is completed by gluing a foam triangle to a piece of felt, then sewing the corners to one of those cheap stretchy one-size-fits-all gloves with the fingers cut off. The bracer and the glove aren't attached to each other, but this is how they should appear when worn. Foam is incredibly sweaty when worn by itself right against the skin, so the inside of this has some thin shirt fabric hot glued in.


Mask paint progression:
In hindsight, I should have put that black fabric on after the whole thing was painted.

The belt buckle skull is painted with a pearlescent silver acrylic, a shadows deepened with silver tinted with black and then thin coats of straight black. White was added to the high points. The round buckle part is the lid of a plastic jar with a slightly beveled edge, also painted silver with highlights/shadows, and the flat black is a circle of foam. The whole thing is attached to the actual belt with velcro so it can be removed when clipping or unclipping.


The back: paint and glue. The black panels are glued along each top edge where they cover the felt, the yellow arch is glued along the seam at the top of the shoulders and along each outside edge.


The front sides of the vest have some edging, but that process is the same (and less interesting to look at) than the other armor parts. I glued those strips to the backpiece before I attached them both to the felt.


I added just a little bit of color detail to the felt pieces hanging below the belt, so they wouldn't look too flat. I watered down the orange and brown paints used for shading and spritzed them to the top and bottom of each felt piece. Like the mask, I could probably have pushed the dark a little more, but I'm afraid of pushing it too much. Paint soaks into felt exceptionally well, and it doesn't spread easily, so anything painted can't be undone.

Costume pieces semi-assembled (ignore the red shirt and black towel, I couldn't find a plain black tee shirt to put on the dress form).


One of my favorite things about this costume is the mask-hood attachment: magnets! One glued to the inside of each cheekbone in the mask, and one sewn into the corresponding place in the hood. It pulls right off and clicks right back into place (adult Halloween costumes are best designed with drinking in mind).

Of course, it's better comedy when you pretend it never comes off. (I didn't take these, but I love them.)